2 - Installing SVN Support
Table of Contents
Tutorial Part 2 - Installing SVN Support
Apache Subversion (or SVN for short) is a version control system used to store and keep track of project source code. The LiteLoader source you will use for development is hosted on a public SVN repository and you can use an SVN client to download the source into your Eclipse workspace.
Eclipse doesn't have an SVN Team Provider “out of the box”, but installing one from the Eclipse repository is very easy.
Installing Subversive SVN
First, open Eclipse and select the default workspace (we will change this later on but leave it alone for now). Then from the “Help” menu select “Install New Software…”

Eclipse is provided with a default software repository or “site”.
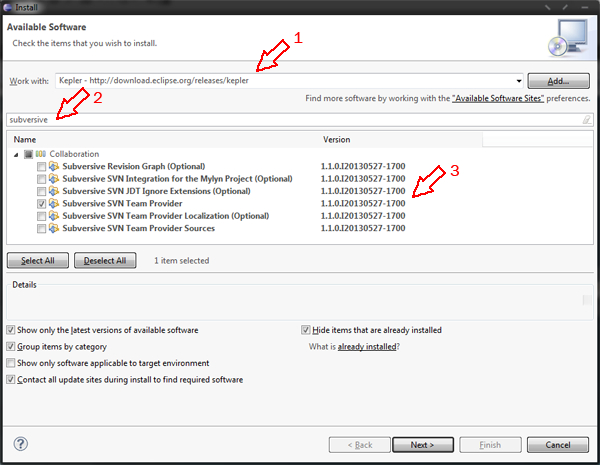
- In the “Work With” box, select the “Release” site for the version of Eclipse that you have installed, for example if you have installed Eclipse Kepler, choose the Kepler site from the drop down list. Eclipse will pause while it connects to the repo, this is normal.
- In the search box, type “Subversive”. Eclipse will pause whilst it searches the repo and filters the results.
- A single category, “Collaboration” should appear, expand the category and select the Subversive SVN Team Provider from the list. Then click next.
- Follow all the prompts and accept the license agreement, then click Finish. Eclipse will then download and install the SVN provider and when completed it will prompt you to restart Eclipse.
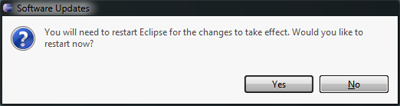
- Allow Eclipse to restart by choosing “Yes”.
Once Eclipse has restarted you will be presented with a welcome screen. You are now ready to install the SVN Connector which will be used to link the Team Provider to the SVN repository.
Installing the SVN Connector
Normally the Team Connector screen is displayed the first time you open a project after installing Subversive, however we don't have any projects in this temporary workspace so we will take an alternative route to get the prompt to be displayed.
- From the “Window” menu, choose “Preferences”. When the preferences window is displayed, navigate to Team → SVN. The “Install Connectors” dialog should be displayed:
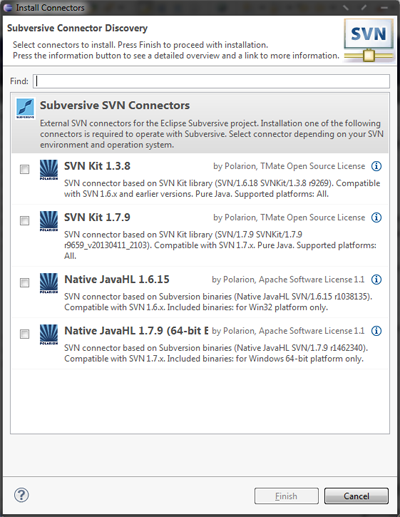
- Choose an SVN Connector to install, I recommend using the SVN Kit 1.7 or later plugin.
- Accept all the prompts and license agreements, then click OK to close the “Preferences” window. Once the installation is completed you will be prompted to restart eclipse again. Once the restart is completed your SVN plugin is now ready to use.
Navigation
- Next Setting up MCP
- Previous Setting up Eclipse


