4 - Getting the LiteLoader source
**This is an old revision of the document!**
Tutorial Part 4 - Getting the LiteLoader source
Now that you have Eclipse and MCP installed, you can fetch the LiteLoader projects from the SVN repository.
- In Eclipse, click “File” and then “Import…”
- In the SVN category, select “Project from SVN” and click “Next”
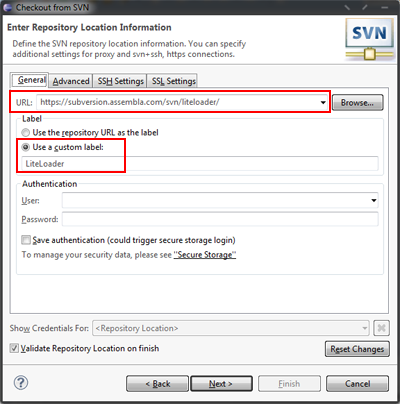
- In the Repository Location Information dialog, enter the repository URL and (optionally) name it “LiteLoader”
- Repository URL: https://subversion.assembla.com/svn/liteloader/
- You will be presented with the Select Resource Dialog, click “Browse…” and choose the appropriate resource
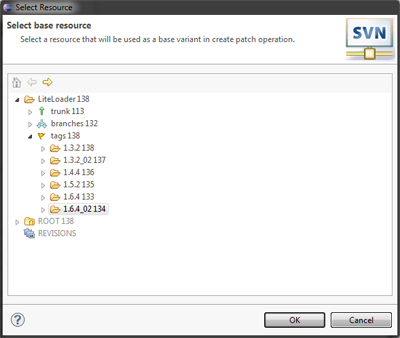
- For the latest source (usually for the most recent minecraft release but check the commit log to be sure, you can check out the trunk from
- If you are using an older version or want to use a particlar version of liteloader you can find release versions under the tags node. Simply expand LiteLoader and then tags and select the appropriate tag, eg. for 1.6.4 you could use
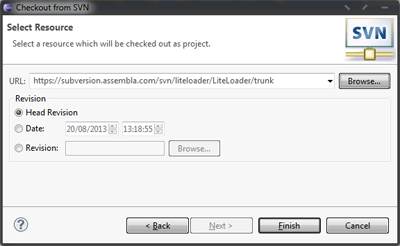
- Click Next and Eclipse will query the repository, once it has done so it will present the Check Out As dialog
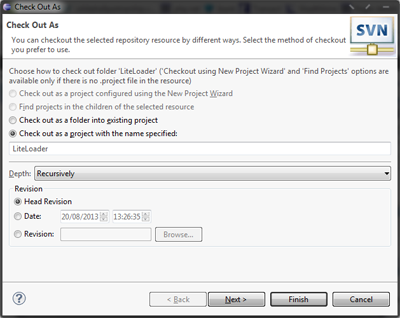
* Click “Finish” to accept the defaults and import the project.
The LiteLoader project is now imported, and you can add them to your Run Configuration.
Adding the project to your MCP Run Configuration
Importing the project from the SVN does not actually cause it to run when you run the game inside Eclipse. To include the new projects you must add them to the class path of the Run Configuration for Client.
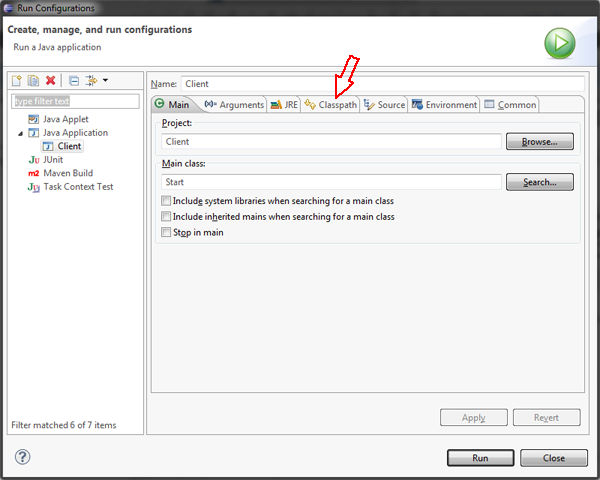
- In Eclipse, click “Run” and then “Run Configurations…”
- In the “Main Class” box enter the following class name:
- com.mumfrey.liteloader.debug.Start
- Next, click the “Classpath” tab
- Click the “User Entries” node in the Classpath tree
- Click the “Add projects” button on the right
- In the Project Selection dialog, check the “LiteLoader” project and un-check the “Add required projects of selected projects” option
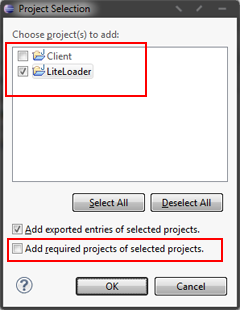
- Click OK and the project and the dependencies will appear in the classpath:
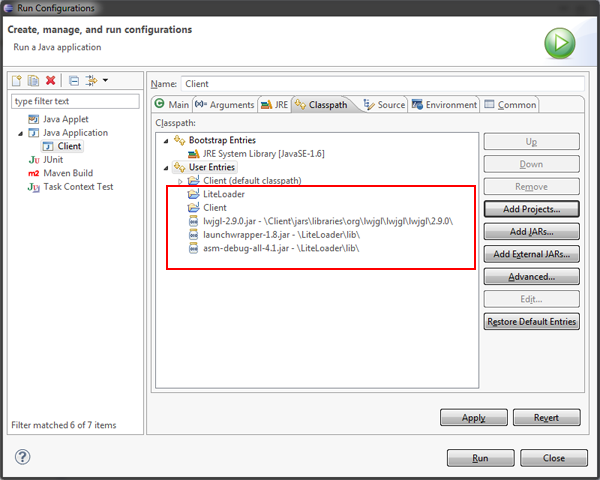
- Now click “Apply”, then “Close” to save the changes
- Your workspace is now ready to add your mod projects.
Next - Your JDK and Recommended Environment Previous - Setting up MCP


